In this blog post I am going to show you how to do the following:
- Setup screen sharing on Mac
- How to view the shared screen
Important Notice: If you are sharing your screen with another Mac, the user of that mac can see, edit and control your Mac Remotely.
First, we are going to set up the screen sharing on your Mac, these are the steps that you should follow:
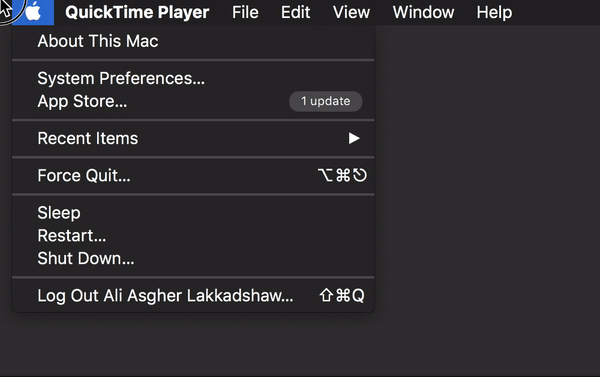
- On your Mac computer click on the apple logo on the top left corner of the screen, then select system preferences from the drop-down menu. A system preferences window will come up as shown in the image.
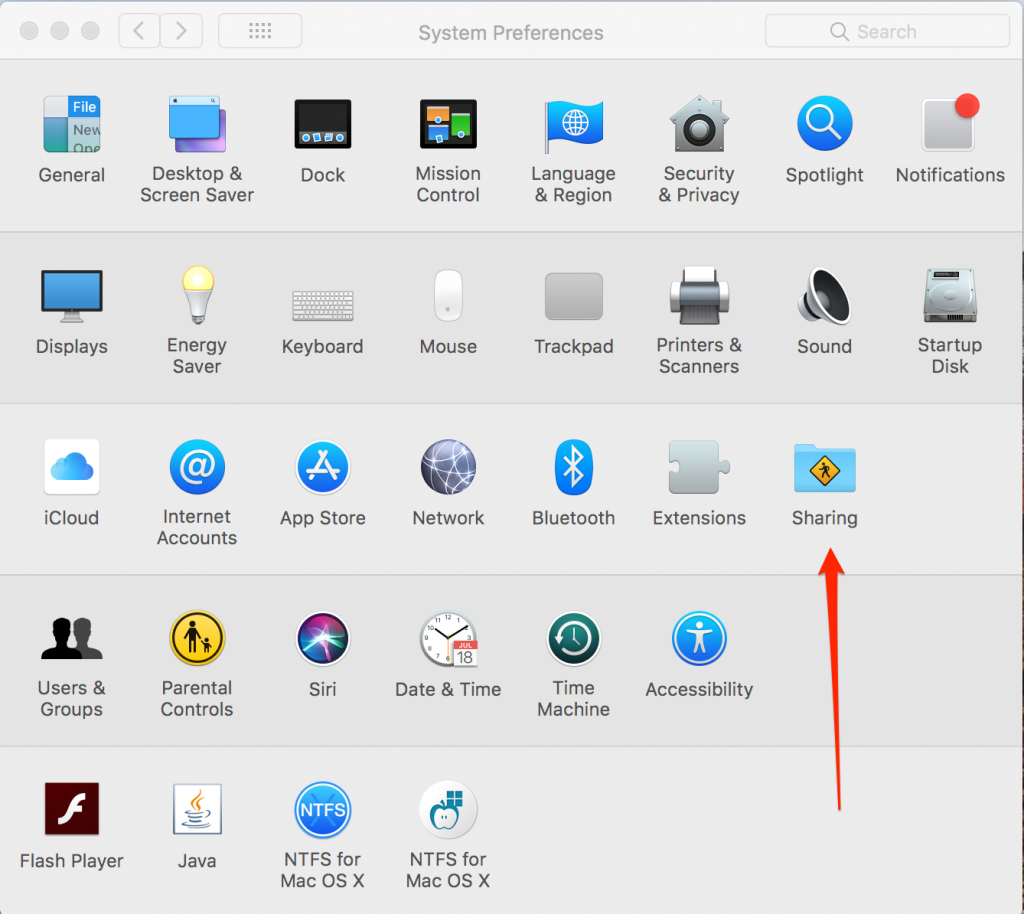
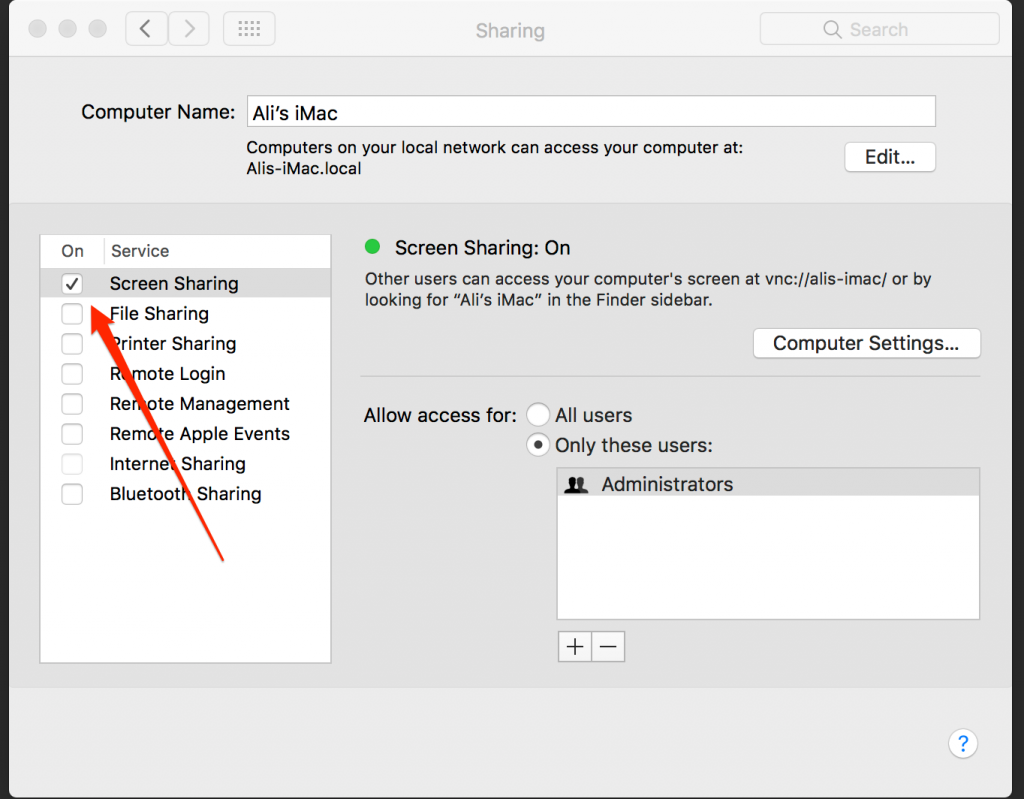
In the system preferences window click on the sharing icon. A sharing window appears, here on the left-hand side, there is a list of services that you can switch on. The first item on the list is screen sharing click on the checkbox to switch it on. Refer the image for more details. Note: If remote Management is selected, it must be deselected before selecting the screen sharing option.
If you are looking for a live streaming chat solutions check out our article: Top 5 best live streaming chat tools for broadcasting in 2023
Pro tip: By default, only administrators are allowed to share the screen on Mac, you being the administrator will have that right. But if you want users with a guest account to also be able to share the screen, on the bottom right-hand side of the sharing folder there are radio buttons with the text “allow access for:” the switch it to all users from only these users. For more details refer to the image above.Here a quick video of how to setup screen share your screen on Mac (The steps taken till now):
Additional Options
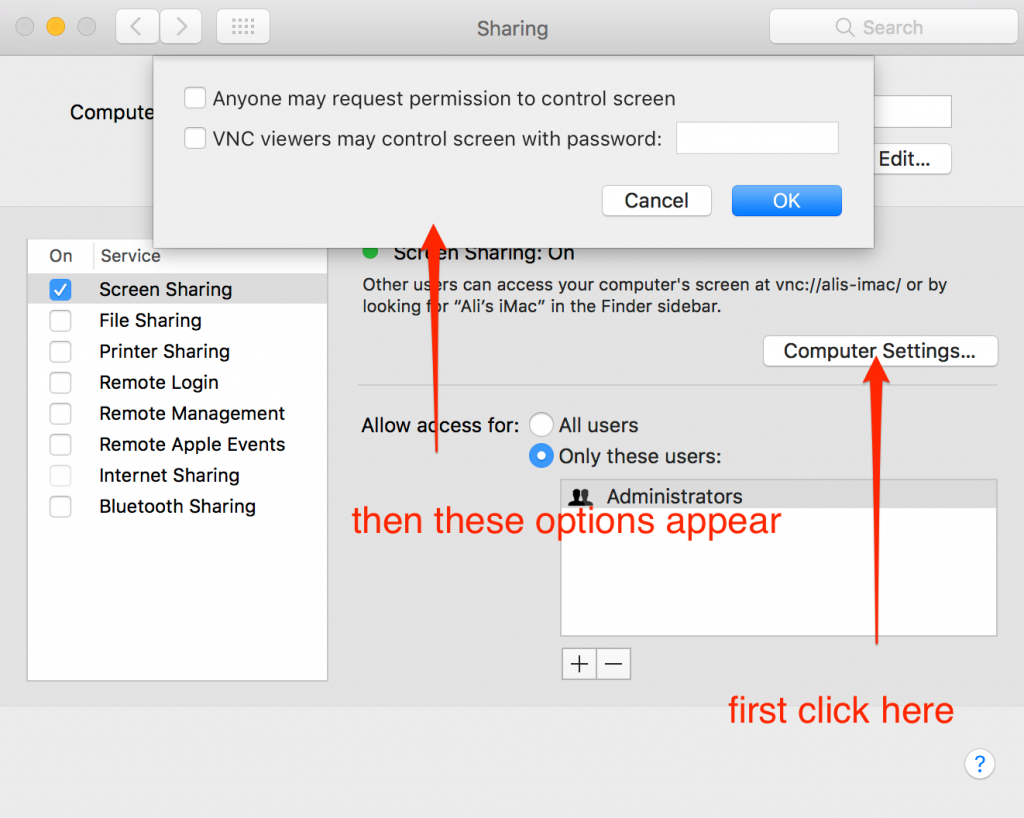
There are two additional options which you can access by clicking on the computer settings button on the middle right section of the sharing window.When you click on this button a pop-up comes up with two options:1. Whether you would like anyone to request permission to view the screen and control the screen.2. VNC viewers can control the screen with password: you can set the password.

How to view screen of another Mac
Before you start make sure the Mac whose screen you wish to see has screen sharing turned on, as shown in the tutorial above.
Next steps:
- Open a finder window. On the left-hand side menu, there is a section called “Shared”, you can see any available computers on the network here. If nothing is shown here put your cursor on the shared section and a button with label “show” will appear, click on the show button and you will be able to see available computers. Refer to the image below.
- Double click on the computer whose screen you want to see
- The moment you click on the computer you wish to see the screen of a bar appears on the top to the finder window with buttons share screen and connect as. Click on the share screen button
- If both the computers are logged in via the same apple id the screen sharing will start. If not, then you will have to enter the username and the password of a user who is allowed to share the screen from that Mac. (We saw how to allow this in the section above) or you can request permission to screen share if the other computer allows it.
- If someone is already connected to the Mac as a remote user, a dialog asks if you wish to share the screen with the other user or login simultaneously with a different username and screen.
Note: If you choose Log In, you share the Mac as a remote user, but you won’t share the same screen.
Another method of viewing the Shared Screen of the mac.
You need to know the IP Address or DNS name if the Mac you remotely want to see the screen off. To see the IP Address of a Mac go to system preferences and select network then on the top right-hand side you can see the IP address. Refer to the image below
To get DNS address and IP address click on the advance button on the bottom right-hand side on the network window. A pop up will come up, on the top there is a bar of buttons click on the TCP/IP button to get the IP Address and on the DNS button to get the DNS.
Now, open the finder window. On the top bar on you click on the go drop-down button, you will see a list of buttons from that select the last item “Connect to server”. A new window will open with heading connect to the server. In that, there is a text input for server address where you can write either
in the Server Address field.
Adjust Size and Quality of Screen Sharing
- Start a screen sharing session with a Mac.
- Once the session start’s click on the session window then on the top bar of your mac you can see screen sharing click on it, then click on preferences and a window will appear with settings for display quality and users
Under display, you can select
- Scale to fit available space OR
- Show full size
You can choose each one depending on the size of your display and how much of it you want to use it for viewing the shared screen.
Again, Under Display, you can select “Schroll the screen option” to decide how the screen sharing window behaves when you move your pointer there are three options here.
Under quality, there are two options
- Adapt quality to network settings (faster). Use this option when you want seamless screen sharing, although the quality might improve or deteriorate the screen sharing will not stop or hang.
- Show the screen at full quality (more detailed) Use this option when you want to see the details of the screen and have good internet connectivity.
- Under blocked users, you can decide whether anyone can request a screen sharing using an apple id or just your contacts. To block users from specific apple ids click on the + icon and enter the apple id of the user and then click block as shown in the figure.
Misc Options:
Once you have started screen sharing you have a wide variety of options at your disposal:
Control or Observe: In the top left corner, there are two switch buttons as shown in the figure below. You can toggle whether you wish to control the mac which screen you are seeing or you just want to observe the screen.
Turn Scaling ON/Off: With scaling on the entire screen of the mac is displayed on your mac so if you want to have a birds-eye view of the screen switch it to scaling on.
If you wish to see minute details of the screen you can turn off the scaling and it will appear as big as it is and it might require you to scroll a bit to see the screen.
Displays: If the Mac whose screen you are viewing have multiple displays you can choose which display screen you want to view
Adapt quality: As I said above you can choose this if you prefer smooth screen share experience over slower networks. Adaptive quality adapts the quality of screen share to the bandwidth available.
Full Quality: Full quality screen sharing renders full quality screen sharing experience, not recommended over slower networks speeds.
Show/Hide toolbar: you can show and hide toolbar if you wish.
Enter Fullscreen: the shared screen expands to fill your screen to see the toolbar just take your cursor pointer to the top bar of your mac
Show tab bar: use this option to display or hide the tab bar
Customise toolbar: drag buttons in and out of the toolbar.
Share Clipboard Contents with Another Mac
With this option, you can also share a Clipboard with the computer that you are doing a screen sharing session with.
Some of the things which you can do here are:
- Copy text from one computer to another
- Copy images from one computer to another
- Copy website url from the browser of your computer to the one which is sharing their screen with you
- Copy text from a document on one Mac and paste in on another mac to create a clipping
An Easier way to Screen Share
Screen Sharing on Mac using apple’s screen share program is quite a deal. I mean there are lots of options and buttons. Granted, these are quite good and useful as well but what if you just want to get the job done and not mess around with network settings and IP Addresses.
Well, here is a screen sharing tool of your dreams. Just go to DeadSimpleScreenSharing.com and click on Get started button and Voila you are sharing your screen as simple as that or shall I say Dead Simple:

Dead Simple Screen Sharing is free but not only that:
- You do not need to create an account SignUp OR Login.
- Can conduct Audio Conferencing for free
- Works out of the browser so no need to install anything
- The viewer can be on Mac, Linux, Windows or even Mobile devices.
Here a quick video on how you can share your screen with Dead Simple Screen Sharing
So, here you go. If you have any questions queries or difficulty in sharing your screen, please feel free ask in the comment section below and I will answer them promptly.
Thank you.
Join the conversation.